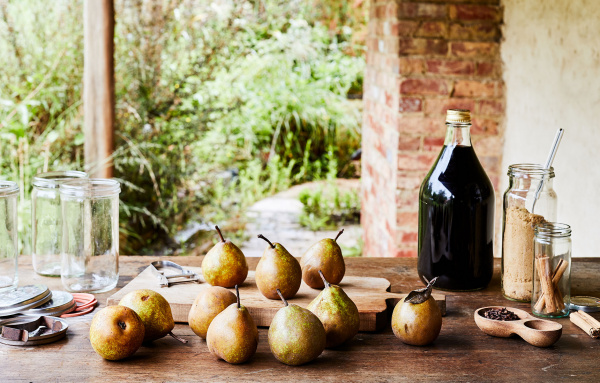
When I was little I remember vividly going to visit my grandparents in the English countryside. As soon as we’d get there, my brother and I would excitedly run out to their garden to their big pear tree. Grandpa would lift us into the branches so that we could pick our own fruit. No matter what time of year we went, there was always the juiciest couple of pears waiting for us! I now know that pears don’t actually grow on trees in the middle of an English winter, and Grandpa had in fact been tying the pears to the tree with string so that we’d always be able to have the fruit that we want, no matter the season.
This recipe is a favourite in our house for its simplicity and comfort, and because it means we get to enjoy pears the whole year round. There is nothing quite like seeing the pears tumble out of the jar, a perfect dessert ready-made. Sometimes, we warm them up in the oven and serve them with a scoop of vanilla ice cream or thick cream, but you could also add them to trifle, tip them on top of a pavlova or rich chocolate cake, or add them to muesli and yoghurt for a (slightly) boozy breakfast addition. The port gives them a wonderfully spicy, and somewhat grown-up alcoholic sweetness that is perfect for festive occasions with friends. Bring on Christmas!
Ingredients (Makes 4 x 1-Litre Jars)
8-10 pears (one with a nice firm flesh are best for this)
2 cups of brown sugar
Cinnamon sticks (1 per jar)
2 cups of port + 1 extra glass
2 cup of boiling water
Cloves
Method
Peel the pears and cut them in half, keeping the stalk on. Don’t worry if the pear has pips in the centre, it is much better to leave them in whole halves than try to cut out the middle. To prevent browning, place the peeled pears into a bowl of water with lemon.
Combine the brown sugar and boiling water. Mix until dissolved. Take the extra glass of port you put aside at the start and enjoy a drink while you’re making it all. You have to enjoy the process! Add the remaining port to the sugar and water mixture and stir until combined.
Pack the pears into the jars. You’ll need quite wide jars for this as the pears take up a lot of space and they’re much easier to pack when they’re in a wide-topped jar. If necessary, you can quarter the pears instead but ideally, you want to keep them in halves as they are just so much more enjoyable to eat later on when they’re in larger pieces. Place a cinnamon stick into each jar, along with 2-3 cloves.
Pour over the liquid into the jars until it covers the pears. Seal with a lid. As pears vary in size so considerably, it is really hard to give an exact amount of fruit for this recipe so if you have too little of the liquid then just make an extra batch (it should only take a couple of extra minutes). I usually make extra just in case!
Now it is time to preserve them so that you can store them for months and eat them later on in the year when pears are no longer in season. The steps for preserving in a jar are similar than the ones you did for the mustard.
Take the biggest and tallest pot you have, and line the bottom with a tea towel. Place the jars of pears on top of the tea towel, making sure that the jars aren’t too close together to prevent breakage. Fill the pot with water making sure to cover the jars. Bring the water to boil over medium heat, and once boiling, leave the jars submerged and boiling for at least 2 hours so that the pears have plenty of time to soften and the liquid to become syrupy. After 2 hours, remove the jars using tongs and place onto a heatproof surface. Store in a cool, dark place until you’re ready to eat them!

Pears and port. Photo – Amelia Stanwix for The Design Files.

Peeled pears. Photo – Amelia Stanwix for The Design Files.

Alice shows us how it is done! Photo – Amelia Stanwix for The Design Files.

Picture perfect and absolutely delicious! Photo – Amelia Stanwix for The Design Files. Beautiful bowl from The Establishment Studios.

If you follow our method, they will keep for months! Photo – Amelia Stanwix for The Design Files.

Dexter, Marlon and Alice – adorable! Photo – Amelia Stanwix for The Design Files.


