Last year, my husband and I planted our first container garden. While we loved the concept, we realized we really needed an elevated planter box to prevent animals (and pets) from eating our vegetables and herbs. Standing planter boxes are also excellent for people with limited mobility, and work well in small spaces.
Video of the Day
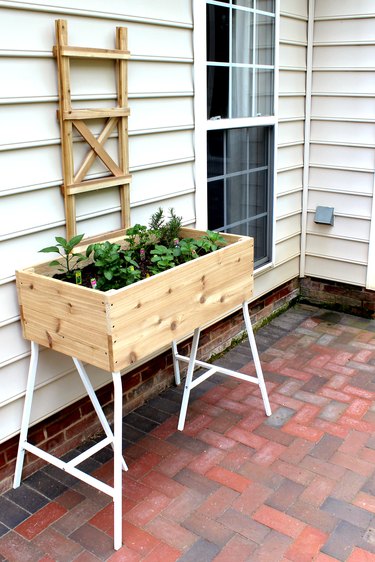
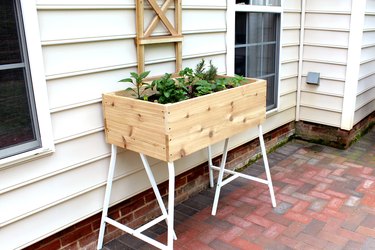
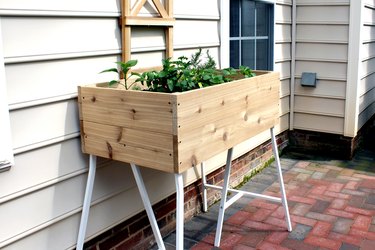
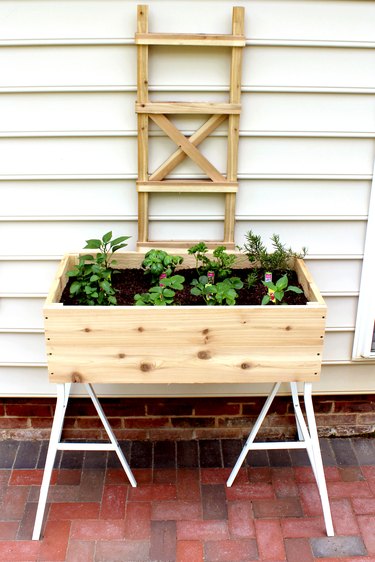
This planter box is 36 inches by 19 3/4 inches and 11 inches tall. On trestle legs, the planter box is approximately 37 1/2 inches tall — perfect for herbs and a few vegetables or flowers! We used cedar because it is aesthetically appealing, resistant to rot, and readily available at home improvement stores. The fun part of this project is we ended up \”Ikea-hacking\” the legs with trellis legs we already owned. The bulk of the project involves building the cedar box, which can easily be completed in an afternoon.
Things You\’ll Need
-
1 x 6 cedar, 36 inches long (4)
-
1 x 6 cedar, 18 inches long (4)
-
1 x 6 cedar, 34 1/4 inches long (3)
-
1 x 1 1/2 inch cedar, 9 inches long (4)
-
1 x 1 1/2 inch cedar, 16 1/4 inch long (2)
-
Saw
-
Cut suggestions printable (click here to download)
-
2-inch deck screws
-
Drill with set of twist bits, screwdriver bits
-
Tape measure
-
Carpenter\’s square
-
Bar clamps
-
Staple gun
-
Landscape fabric
-
Potting soil mix
-
Scissors
-
Two Ikea LERBERG trestle legs
-
Small trellis (optional)
Tip
We used three 1 x 6 cedar planks, 12 feet long, and one piece of 1 x 1 1/2 inch cedar, 8 feet long, which left us with some leftover wood. If you request to have the wood pieces cut at your local home improvement store, you will not need to make any cuts at home with a saw and will have the perfect amount of wood necessary for this project.
Step 1
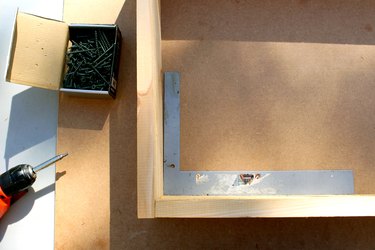
Cut the cedar pieces to size, according to the Things You\’ll Need dimensions, using this guide. Use a carpenter\’s square to mark cuts that are at exact 90-degree angles. On a level surface, position two 36-inch pieces and two 18-inch pieces of cedar to make a rectangle box shape. The long pieces should overlap the short pieces at the corners. Use your carpenter\’s square to ensure all the corners are square.
Step 2
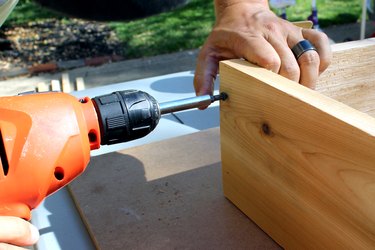
Using an electric drill and a 1/8-inch drill bit, drill two pilot holes, one near the top and one near the bottom of the wood piece. Drilling pilot holes will prevent the wood from splitting when you drive the screws.

Step 3
Position the pieces together again. Use a drill and screwdriver bit to secure the joints by driving 2-inch deck screws through the pilot holes.
Step 4
Repeat for each corner. The entire cedar box will require eight screws — two per corner.
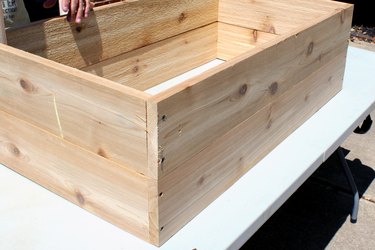
Step 5
Duplicate steps 1-4 to make a second, identical cedar box. Then, stack one box on top of the other.
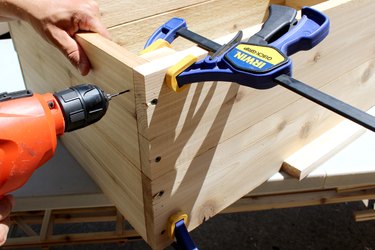
Step 6
Now you will reinforce the corners with wood slats. First, secure a 9-inch wood slat to one inside corner of the stacked boxes, flush with the top of the box, using clamps.

Step 7
Drill pilot holes through the outside face of the cedar, one in the top board, another in the bottom, then drive deck screws through the pilot holes, securing the wood slats. Repeat this step to attach a 9-inch piece to the other inside corners of the box.
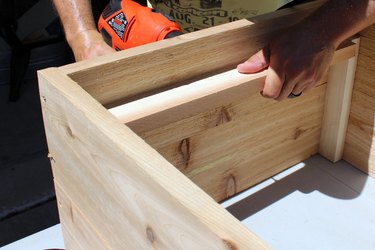
Step 8
Now, flip the box over and position a 16 1/4 inch wood slat horizontally at the narrow side of box, so the ends of the slat are flush with the tops of the vertical slats. Drill pilot holes from the outside, and secure the horizontal slat with deck screws. Repeat at the opposite end of the box with the second 16 1/4 inch wood slat on opposite side of box.
Step 9
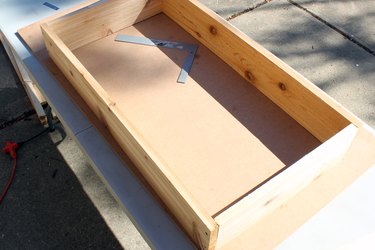
Lay out three 34 1/4 inch wood planks lengthwise across the bottom of the box so the ends rest on the end slats, spacing them so the gaps between boards are even. This will become the bottom of the box. The gaps between the wood planks will allow for drainage.

Step 10
Drill pilot holes and attach the planks to the underlying slats with deck screws — two for each end of the plank. You will use a total of twelve screws in this step.

Step 11
Flip the box so that it\’s facing up. Rest it on a set of two trestle legs positioned in the desired location for your raised garden. The planter will be rather heavy once it\’s filled with soil, so make sure you position it where you want it before proceeding.

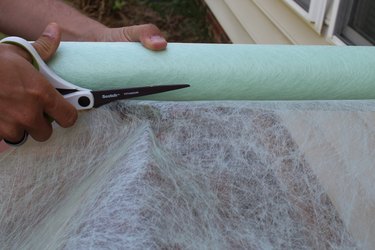
Step 12
Cut landscape fabric to the size of the planter box with a little excess around each edge. Landscape fabric serves several functions: It keeps soil in place, protects the cedar against rot and allows for water drainage.
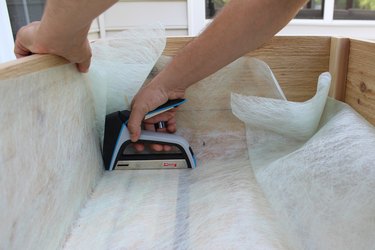
Step 13
Use a staple gun to secure the landscape fabric along the bottom edge of the box and halfway up the sides and ends of the box.
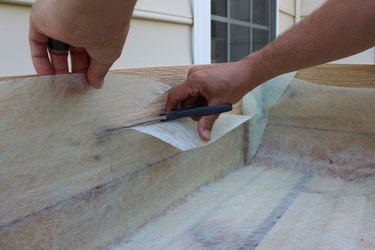
Step 14
Cut away any excess landscape fabric slightly above the staples.
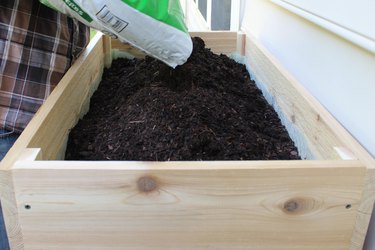
Step 15
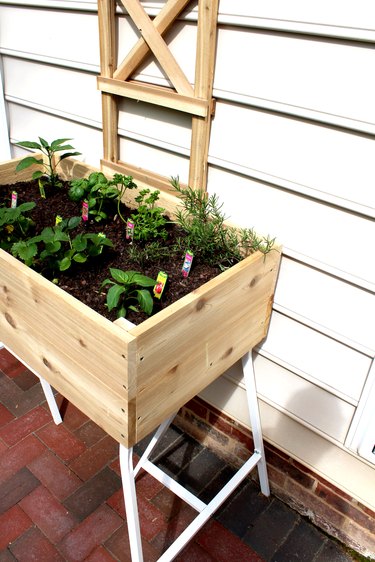
Pour in potting soil and plant your favorite flowers or garden vegetables!
Tip
Resist the impulse to fill your planter box with ordinary dirt. When saturated with water, ordinary dirt can weigh close to 200 pounds, the maximum load that can be carried by the trestle legs used in this project. Potting soil, on the other hand, not only weighs less to start with, but is composed of materials that drain easily.
If you\’re planting any vine-type plants or vegetables, such as green beans or cucumbers, consider adding a small trellis to your elevated planter box. This can be attached on the back of the cedar box with deck screws or placed directly in the soil.
While the cedar planter box can be placed anywhere outdoors, make sure you understand your plants\’ sunlight requirements, and place the standing planter box in a space that gets the right amount of sunlight. Most vegetables require a minimum of six hours of sunlight a day to thrive, while some flowers can survive nicely on less sunlight. We chose to place our planter on our back patio, where we get mostly sun with some shade in the afternoon.